Before you start ripping grout out, you need the right method for your tile, your space, and your patience. Some jobs call for a simple hand tool, while others need more speed or a way to soften stubborn grout first. Should you choose the wrong approach, you can chip tile fast, and nobody wants that kind of surprise. Here’s how to match each breakout method to the mess in front of you so you can work cleaner, safer, and with a lot less stress.
Pick the Best Grout Removal Tool
Start choosing the tool that matches your grout job, because the wrong one can turn a simple fix into a long, messy afternoon.
For small touch-ups, a handheld grout saw gives you control in tight spots. For wider joints, an oscillating tool or rotary tool saves time and keeps your hand steadier. Should you want less risk, pick a tool with a narrow, sharp bit and let it ride the line, not the tile edge. Good tool selection also depends on material compatibility, since soft tile needs a gentler touch than hard stone.
Wear gloves and a mask, then test an unseen spot first. Once the tool fits the surface, you work cleaner, safer, and with more confidence.
Remove Grout by Hand
In case you remove grout manually, you take the slow and careful route, and that can feel a lot less stressful than firing up a power tool. Put on grout gloves, then work along the joint with finger pressure and a steady rhythm. You’ll loosen small bits without rushing the tile. Keep your other hand close to catch flakes and guide the motion.
In the event a section resists, stop and ease up instead of forcing it. That patience helps you stay in control and feel less like the room is winning. Wipe away dust as you go so you can see the clean line and keep your spacing even.
With each pass, you build confidence, and the task starts to feel manageable, not messy.
Use a Grout Saw for Small Jobs
You can use it in tight corners and around fixtures, where bigger tools feel clumsy and risky.
Hold it at a slight angle, use gentle pressure, and you’ll protect the tile while you clear the joint cleanly.
Grout Saw Basics
A grout saw gives you a simple, hands-on way to remove grout from small jobs without dragging out big power tools. You can guide the blade slowly through the joint and feel real control, which helps you stay calm and confident.
Choose a model with diamond blades provided that you want steady cutting, and look for ergonomic handles so your hand won’t tire as fast. Start with light pressure, then make a few careful passes instead of forcing it. That approach helps protect the tile edges and keeps the line neat.
Should the joint turn tight near a corner, the saw still lets you work with care. It’s a practical tool that fits right in whenever you wish to fix a small area without stress.
Best Small-Area Use
Need to handle a small grout job? You’ll fit right in with a grout saw. It lets you work in tight corners, around sinks, and behind fixtures where bigger tools feel clumsy. For tiny repairs, you can focus on grout color matching and keep the joint neat.
| Small-job task | Why it helps |
|---|---|
| Spot repair | Targets one line only |
| Tight corner work | Reaches concealed joints |
| Touch-up cleanup | Leaves less mess |
If the grout looks stained initially, try eco friendly solvents to loosen the surface grime. Then use gentle, steady strokes and let the saw do the work. You don’t need brute force, and that’s a relief. This approach helps you stay in control while keeping the tile edge looking like it belongs there.
Safety And Control
In case you use a grout saw on a small job, control matters more than speed, because one slip can nick the tile edge and turn a quick fix into a bigger headache. You’ll feel steadier whenever you brace both hands and keep the blade in the joint, not on the glaze.
Wear personal protective equipment, including gloves and eye protection, so dust and grit don’t get the best of you. Then set up controlled workzones with clearing loose items, lighting the area well, and keeping the tool path open.
Work in short passes, check your depth often, and pause whenever the saw starts to wander. That slower rhythm helps you stay accurate, protects nearby tiles, and keeps the job feeling manageable, even should the corner fight back a little.
Use an Oscillating Tool for Fast Grout Removal
You can speed up grout removal a lot with an oscillating tool, and it’s a big help whenever hand tools start to wear you out.
Set the blade in the grout line at a slight angle, then let the tool do most of the cutting instead of pushing hard.
Work in short passes and check the depth often so you stay in the joint and keep the tile safe.
Oscillating Tool Setup
Set up your oscillating tool the right way, and grout removal gets a lot less stressful fast.
Start checking blade alignment so the blade sits centered in the joint, not against the tile edge. Then choose speed settings that match the grout and let you stay in control. A lower setting often feels safer while you’re learning, and it helps you settle into the work with confidence.
Tighten the blade firmly, plug in the tool, and test the vibration before you touch the wall. Keep both hands on the grip, breathe slowly, and let the tool feel like part of your team. Once everything is set, you can move with less worry and more trust in each pass.
Fast Grout Cutting
An oscillating tool can chew through grout fast as you guide it with a light, steady hand. You fit a grout blade, then start with grout scoring to open the line cleanly. Keep the blade centered, and let the tool do the work. | Speed | Control | Safety |
| — | — | — |
|---|---|---|
| Fast cuts | Light pressure | Mask on |
| Less dust | Steady angle | Gloves on |
| Clean joints | Short passes | Check depth |
If the grout feels hard, chemical softening can help initially. Spray it, pause, then cut again. Move along each joint in small sections so you stay accurate and avoid chipping tile. Once you hear the blade hum smoothly, you’re in the groove, and that makes the job feel less lonely. After each pass, vacuum the dust and check your depth.
Use a Rotary Tool for Stubborn Grout
Whenever stubborn grout refuses to budge, a rotary tool can save you a lot of time and elbow grease. You still need steady hands, sharp focus, and good rotary safety, because the bit can slip fast. Choose bit selection based on joint width and tile hardness, then test a small spot initially.
- Mark the grout line and keep the tool angled.
- Let the bit do the work, not your grip.
- Move in short passes so you stay in control.
- Pause often to check depth and protect tile edges.
With patience, you’ll clear tough grout without feeling like the job owns your whole weekend. You’re not alone here; this tool fits right into a careful team effort, and your tiles will thank you later.
Soften Old Grout With Heat or Water
Whenever old grout feels hard as a rock, water or gentle heat can help loosen it before you start scraping.
You can start with a warm, damp cloth or a hot compress pressed along the joint for a few minutes. That little pause gives the grout a chance to soften, so your next pass feels less like a battle.
In case the area is larger, try steam application with a handheld steamer and move slowly so the moisture can soak in. Then test a small section with light pressure.
Should it still resists, repeat the heat or water step instead of forcing it. You’ll protect the tile and save your hands, and honestly, that’s a win your whole crew can feel.
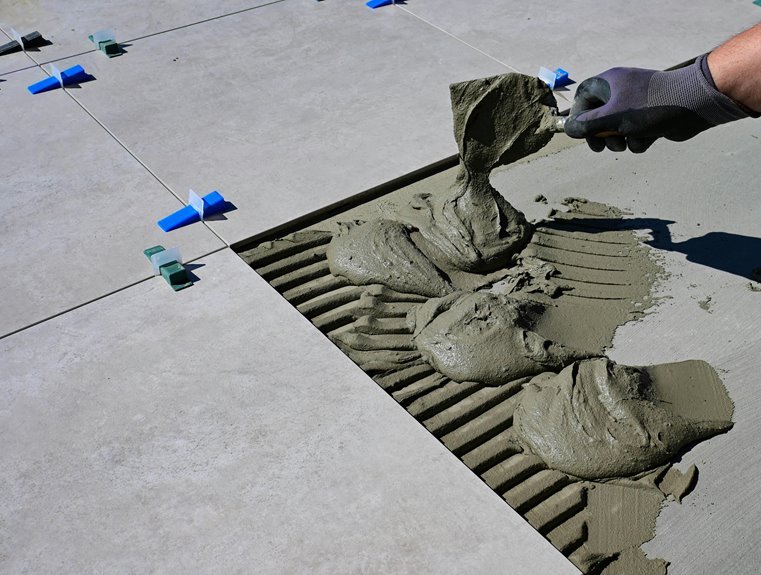
Clean Up Dust and Prep for New Grout
Now that the old grout is loose, you’ve got to clear out every last bit of dust and debris before fresh grout goes in. You’re not just cleaning; you’re making room for a bond that lasts. Start with dust mitigation so stray powder doesn’t drift back into the joints.
- Vacuum the lines with a crevice tool.
- Wipe the tile with a damp sponge.
- Check corners and edges for concealed grit.
- Protect nearby surfaces with surface protection sheets.
If you rush this step, the new grout can fail fast, and nobody wants that headache. Keep your pace steady, and swap dirty water often. Whenever the joints feel clean and dry, you’re ready for the next grout mix.
Frequently Asked Questions
How Do I Know if Grout Is Too Damaged to Salvage?
You can tell grout is beyond repair when the joints are split, stained by water, breaking apart at the edges, or shedding loose pieces. If it still will not hold its shape after cleaning, replacement is usually the best fix.
Can I Remove Grout Without Scratching Delicate Tile Surfaces?
Yes, you can, and many careful DIYers do. Oscillating multi tools can reduce grout removal time by up to 75 percent, and you can protect delicate tile by using soft pads, nonabrasive tools, and light pressure.
How Deep Should I Cut Before Regrouting?
Cut the old grout about 1/8 to 1/4 inch deep, and check your progress often so you do not damage the substrate. Keep the cut depth even and make sure the joint is clean before adding new grout for a stronger finish.
What Should I Do if Grout Is Behind a Toilet or Fixture?
Use a shimmy lift to raise the toilet or fixture slightly, then remove the grout with a handheld grout saw in the accessible areas. If the space is still too tight, open an access panel so you can reach it more easily.
How Do I Avoid Breathing Too Much Dust During Removal?
Wear a respirator and keep dust low by misting the grout, vacuuming often, and working in short bursts. This helps you breathe easier and stay in control.