Getting rid of moths in the kitchen starts with finding the source and tossing any infested dry goods. Next, clean shelves, corners, and cracks to remove eggs and larvae. Vacuum the area carefully so nothing gets left behind. Store food in airtight containers to help stop them from coming back.
How to Spot Kitchen Moths
To spot kitchen moths promptly, check pantry shelves, corners, and package seams for small gray-brown moths, tiny larvae, silk webbing, or clumped food debris.
You can identify common signs through looking for caterpillar-like worms, shed skins, pinhole damage, and fine threads around flour, oats, rice, or nuts.
Inspect ceiling edges, light fixtures, and door hinges too, because adults rest there during the day.
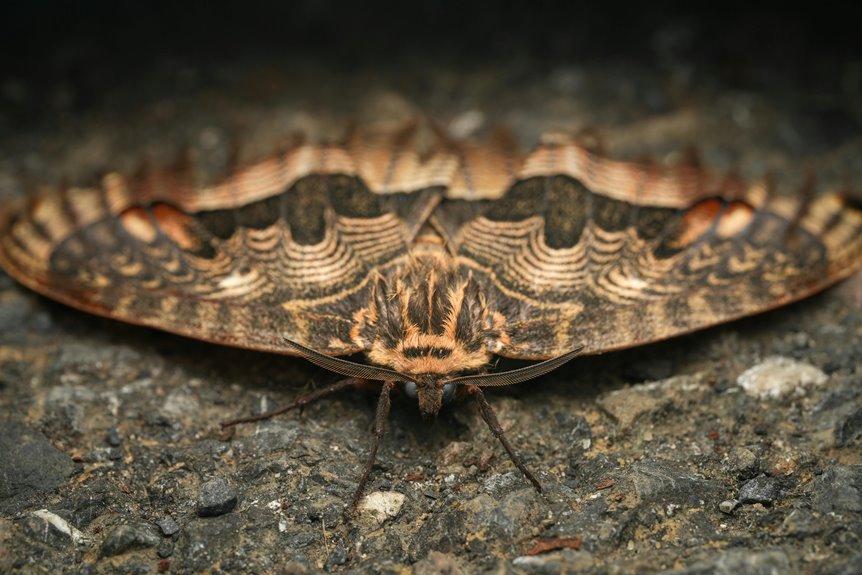
To differentiate moth types, observe that pantry moths usually fly weakly and appear tan with darker wings, while clothes moths stay closer to fabrics and look paler.
Should you see repeated activity in dry goods, assume an active pantry source and check every adjacent item.
Quick, methodical inspection helps you protect your shared kitchen space and act before the infestation spreads.
Throw Out Infested Dry Goods
Remove every infested dry good right away. You need to treat infested goods as contaminated, not salvageable, because eggs and larvae can spread fast.
Follow these disposal methods to cut the cycle and protect your kitchen community:
- Seal opened flour, cereal, rice, oats, nuts, and seeds in a sturdy bag.
- Tie the bag tightly, then place it in an outdoor bin or remove it from home.
- Check adjacent packages for webbing, clumps, or live moths before you keep them.
- Replace compromised items with fresh stock only after you’ve finished the full cleanout.
Do not taste-test suspect food. In case an item shows any sign of infestation, discard it immediately.
You’ll regain control faster once you remove the source completely and act as a team with your household.
Clean Pantry Shelves and Cracks
Next, deep-clean the pantry shelves and every crack where moth eggs, larvae, and webbing can conceal themselves. Remove all items, then wipe every surface with hot soapy water or white vinegar, focusing on corners, shelf pins, hinges, and baseboards.
Use a thin brush or folded cloth to reach seams, trim, and screw holes. Let each area dry fully before you restock. These effective cleaning strategies cut concealed residue and reduce egg-laying sites.
As pantry organization tips go, keep food in labeled, airtight bins so you can spot debris fast and maintain control. Check the pantry door frame, nearby walls, and ceiling line too, since moths often shelter there.
Stay consistent with this routine, and you’ll protect your shared kitchen space from another cycle.
Vacuum Up Moth Eggs and Larvae
Use a flashlight to locate eggs and larvae along shelf seams, corners, and other concealed surfaces.
Vacuum these areas thoroughly, including cracks, crevices, and any webbing where moths can shelter.
Empty the vacuum bag or canister right away so pests don’t escape and reinfest the pantry.
Locate Hidden Eggs
After you clear out the pantry, vacuum every exposed surface, crack, seam, and crevice to pull up moth eggs, larvae, and webbing before they can spread.
Use egg identification techniques to spot tiny cream, tan, or white specks on shelf edges, bag folds, and container lips. Check concealed egg locations such as hinge recesses, screw heads, label glue, and the underside of removable shelves.
- Inspect corners with a bright flashlight.
- Lift liners and check beneath them.
- Scan wall edges near stored food.
- Review cardboard seams before you discard them.
You’re not hunting alone; every careful pass helps protect your kitchen community.
Focus on still, sheltered zones where moths settle, then remove debris promptly. Keep your pace methodical, and you’ll reduce hatch sites fast.
Vacuum Cracks Thoroughly
Power through every crack and seam with a vacuum nozzle to remove moth eggs, larvae, webbing, and concealed debris before they can hatch or spread. Use narrow vacuum techniques on baseboards, shelf joints, hinges, and light fixture edges, where infestation often lingers. Keep the hose slow and steady so suction reaches deep channels. | Area | Nozzle | Action |
| — | — | — |
|---|---|---|
| Shelf seams | Crevice | Trace edges |
| Hinges | Slim tip | Pulse suction |
| Corners | Brush head | Lift dust |
| Light fixtures | Crevice | Remove residue |
| Wall gaps | Hose end | Repeat pass |
After each sweep, empty the canister outside and seal waste tightly. This pest control step protects your pantry team and reduces reinfestation risk. Finish with wiping surfaces clean and checking adjacent storage.
Set Kitchen Moth Pheromone Traps
Pheromone traps can help you monitor and reduce a kitchen moth infestation through attracting adult male moths to a sticky surface. You’ll use them to read moth behavior and improve trap placement, so you’re not guessing where activity starts.
Set the trap in a dark pantry, away from drafts, heat, and open food.
- Unwrap one trap and activate it per label.
- Place it at shelf height near the suspected source.
- Check it daily for trapped males and replacement timing.
- Keep the area clean so you can track new activity.
When you and your household stay consistent, the trap shows whether moths remain active and helps your team cut breeding pressure fast.
Freeze or Heat Affected Food
Should you find infested dry goods, you ought to freeze them in sealed bags for at least one week to kill eggs and larvae.
For items you can’t freeze, you can heat-treat them through exposing the food to a safe, controlled high temperature long enough to destroy moth stages.
After either method, inspect the food carefully and store it in airtight containers to prevent reinfestation.
Freeze Infested Items
Freeze suspect pantry items in zip-top bags for one week to kill moth eggs and larvae, then thaw and transfer them to airtight glass jars or discard them should they show signs of infestation.
You’ll use effective freezing to interrupt development before adults emerge, and careful moth egg identification helps you decide what stays out of circulation.
Keep each bag sealed, labeled, and dated so you can track risk like a pro.
- Inspect grains, flour, oats, nuts, and seeds closely.
- Freeze only dry, sealed items that you trust.
- Move treated food into clean, glass storage immediately.
- Discard anything with webbing, clumps, or live larvae.
This step protects your pantry group and reduces repeat outbreaks without wasting safe food.
Heat-Treat Contaminated Food
As soon as food shows only a possible risk, you can heat-treat it instead of discarding it, but only for dry pantry items that can safely tolerate heat.
Spread grains, nuts, or seeds in a thin layer on a clean baking tray and warm them in an oven at 140°F to 160°F for about 20 minutes. This heat treatment can kill eggs and small larvae without cooking the food.
Stir once for even exposure, then cool it completely before sealing it in airtight containers.
Never heat flour or mixed foods past the point that affects quality, and never reuse food with visible webbing, clumps, or live moths.
Prioritize food safety, label treated items, and monitor them closely so you can keep your pantry group protected together.
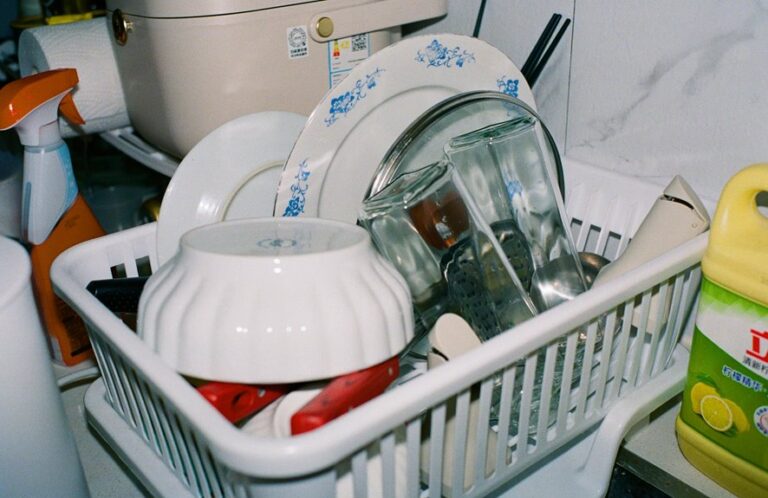
Store Food in Airtight Containers
Transfer grains, flour, nuts, seeds, and other dry goods into airtight glass containers with tight-fitting lids as soon as you’ve inspected them. This gives you clear airtight benefits: moths can’t reach food, and you can spot contamination fast.
Choose storage solutions that seal firmly and resist seams, folds, and gaps where eggs hide.
- Use clean, dry glass jars.
- Label each container with the date.
- Keep bulk foods in separate containers.
- Store only fully cooled, inspected items.
You’ll protect your pantry and feel confident that your kitchen belongs to a well-managed home. Tight seals also limit odor trails, which helps you keep control of the space.
Check lids regularly for cracks or warping, and replace damaged containers immediately so your storage stays secure and effective.
Keep Kitchen Moths From Returning
To keep kitchen moths from coming back, maintain strict pantry hygiene and monitor new food before it enters storage.
Wipe shelves, hinges, and corners with vinegar, then vacuum cracks, light fixtures, and baseboards to remove stray eggs. Wash surfaces with hot soapy water after vacuuming, and empty the vacuum bag right away.
Freeze flour, nuts, and grains for one week before sealing them in airtight jars. Inspect dry goods monthly, discard anything with webbing, and store fresh items in sealed bins away from sugary foods.
Set pheromone traps to catch adult males and check them daily. Add moth repellent herbs like bay leaf to containers, and follow preventive cleaning tips so your pantry stays protected and your household stays in control.
Frequently Asked Questions
How Long Do Pantry Moths Live Indoors?
Pantry moths generally survive indoors for about one to two months, though warmth and access to food can shorten or extend that span. They move through egg, larva, pupa, and adult stages, and their behavior can reveal an infestation early.
Can Kitchen Moths Damage Sealed Canned Goods?
No, kitchen moths usually cannot damage sealed canned goods because the metal and intact seal block them. Check for dents, rust, and swelling, then use moth prevention steps and proper food storage.
Are Moths More Active at Night or Day?
They are usually more active at night, when moths fly and feed. Some may move during the day if disturbed. Use traps at night, check food stores, and seal containers tightly.
Do Moth Eggs Survive Normal Room Temperature?
Yes, moth eggs can survive typical indoor room temperatures, depending on the species and the surrounding conditions. In the moth life cycle, warmth can slow or alter development, but it does not reliably destroy the eggs, so it is wise to freeze suspect foods or inspect them carefully.
Can Pantry Moths Infest Pet Food Too?
Pantry moths can infest pet food as well. Check kibble, seeds, and treats for webbing or larvae, then store pet food in airtight bins and freeze any questionable bags for one week to help protect your home.