

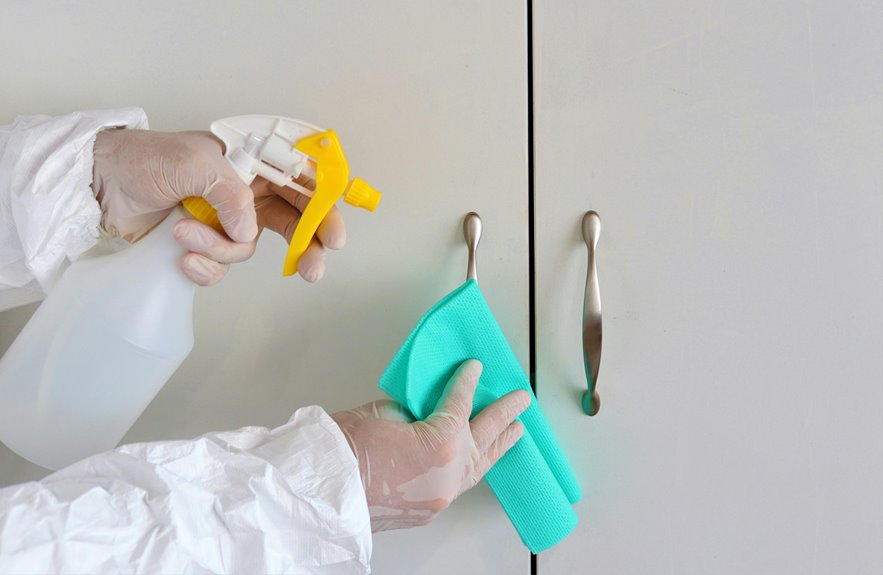

Dust, wipe, dry, and protect, because painted cabinets need a gentle touch should you want them to stay smooth and bright. You can keep them looking fresh with simple supplies, but the wrong cleaner can leave dull spots or peeling paint quickly. Start while checking the finish, then move into safe cleaning steps that lift grease, remove stains, and stop streaks before they settle in.
What Supplies to Use on Painted Cabinets
Start with the gentlest supplies, because painted cabinets do best when you treat them kindly. You can build a safe kit with warm water, mild dish soap, a soft microfiber cloth, and a lint-free towel. Test the mix on a concealed spot initially, so you protect color preservation and avoid surprise dullness. Use the damp cloth, not a dripping one, because too much water can sneak into seams. For corners, a soft toothbrush helps without roughing up the finish. Keep a separate dry cloth nearby for quick drying.
In case grease clings on, a little diluted vinegar can help, but stay light. Save abrasive pads, bleach, and ammonia for somewhere else. They’re not your cabinet’s friends, and your hardware will thank you too.
Dust Painted Cabinets Without Scratching
Dusting painted cabinets the right way is easier than it sounds, and it can spare you from tiny scratches that slowly dull the finish. Use a dry microfiber cloth and move in gentle circles with light pressure. That simple habit keeps your kitchen feeling cared for and welcoming. For microfiber maintenance, shake the cloth often so trapped grit doesn’t rub back onto the paint.
- You keep the shine you worked hard for.
- You stop that rough, dragged feeling.
- You make cleanup feel calm, not frustrating.
- You protect the satisfaction you feel in your space.
If dust sticks, mist the cloth lightly, not the cabinet. Then wipe it dry right away. A tiny amount of anti scratch polish can help between deeper cleanings, but only on a soft cloth.
Check the Paint Before You Start
Before you wash a single door, take a close look at the paint so you know exactly what you’re working with. Check for chips, dull spots, or sticky areas, since each clue tells you how gentle you need to be.
Should the finish feel smooth and solid, you can move ahead with confidence. In case it looks worn or uneven, protect it with extra care.
This quick check also helps you judge finish compatibility, so your cleaner won’t surprise you later. You’re not being fussy here, just smart.
Good prep supports color longevity and keeps your cabinets looking like they belong in your home, not in a repair story. Once you know the paint initially, the rest of the job feels easier, calmer, and a lot less risky.
Clean Painted Cabinets With Soap and Water
Grab a soft microfiber cloth and mix a little mild dish soap with warm water, then gently wipe the painted cabinets in smooth circles. You’ll feel like you’re caring for a shared space, not just a surface. Keep the cloth damp, not dripping, so moisture stays where it should. Dry each area right away with a lint-free cloth to protect the finish and keep the shine even.
- You can breathe easier when the doors look fresh.
- Your kitchen feels cared for, not overlooked.
- Monthly inspections help you catch dull spots promptly.
- A light fingertip polish on handles can finish the look.
If you test one hidden spot first, you’ll clean with more confidence. Then move door by door, so every panel gets the same gentle touch.
Remove Grease From Kitchen Cabinets
Grease can cling to painted cabinets, but you can lift it with a gentle cleaning mix that won’t rough up the finish. Use a soft microfiber cloth and light, circular wipes so you clean the grime without pushing it deeper into the paint.
Then dry each spot right away, because a little care now saves you from bigger sticky patches later.
Grease-Busting Cleaning Mix
Mix a simple grease-cutting solution with warm water and mild dish soap, and you can lift sticky kitchen film without hurting the paint.
You’re not alone provided cabinets feel dull fast, and this mix helps you get back that fresh, cared-for look.
In case you need a stronger uplift, try a light vinegar spray for stubborn spots, or a citrus solvent on heavy buildup.
Both can help whenever grease hangs on like an unwelcome guest.
- You feel proud whenever the finish looks bright.
- You save your energy for the fun parts of cooking.
- You make your kitchen feel welcoming again.
- You know your cabinets still belong in your home, not the grime.
Use the solution gently, so the paint stays smooth and your space stays comforting.
Safe Wiping Techniques
Wiping painted cabinets the safe way starts with a gentle touch, and that matters more than it sounds.
You can dust initially with a feather duster, then use a soft microfiber cloth barely dampened with warm, soapy water. Wipe in vertical strokes, and keep your pressure light so the finish stays smooth.
Should grease clings, let the cloth rest on the spot for a few seconds, then lift it away instead of scrubbing hard.
Clean one section at a time, especially around handles and edges where grime hides.
After each pass, follow with a dry lint-free cloth. That quick step helps you avoid streaks, water marks, and the little sigh of regret that comes from overwet cabinets.
Remove Stains From Painted Cabinets
Before you treat a stain, spot-test your cleaner on a concealed spot so you can make sure it won’t dull or lift the paint.
Then use a mild soap-and-warm-water solution with a soft cloth to lift the mark without roughing up the finish.
In case the stain still hangs on, apply a little more pressure with patience and switch to a gentle stain-fighting mix instead of scrubbing hard.
Spot-Test First
A quick spot-test can save you a lot of hassle whilst you’re removing stains from painted cabinets. Pick a concealed spot, then try your cleaner with a soft cloth. Watch for color fastness and any dulling, peeling, or sticky residue. Should the paint stays steady, you can feel more confident that the finish can handle it. That small check helps you protect the look you love and keeps you from joining the “oops” club.
- You feel calmer whenever the color holds.
- You avoid a patchy surprise on the door.
- You keep your cabinets looking like part of the same set.
- You trust your hands a little more each time.
Next, move forward only after you know the finish compatibility is solid.
Mild Soap Solution
Mixing a mild soap solution gives you a safe, simple way to lift stains from painted cabinets without stressing the finish.
You can stir a few drops of fragrance free detergent into warm water until you see light, eco friendly suds. Then dampen a soft microfiber cloth, wring it well, and wipe the stained area with gentle circles. Keep the cloth moist, not dripping, so you protect the paint and wood below.
In the event the mark fades, rinse the spot with a clean water-dampened cloth and dry it right away with a lint-free towel.
This easy routine helps you care for your cabinets with confidence, and it fits right into a calm home where everyone likes things looking fresh.
Tackle Stubborn Stains
Provided that the mild soap solution only lifts the surface grime, you can step up to stronger but still safe cleaners for those stubborn spots.
Mix equal parts white vinegar and warm water, then test it initially.
In case you see adhesive residue, let the mix sit for a minute, and wipe gently with a soft cloth.
For ink transfer, dab a little baking soda paste on the mark and lift it with light circular motions.
You’re not fighting the cabinet, just helping it look cared for again.
- You keep the finish safe.
- You stay calm whenever stains cling.
- You protect the look your home deserves.
- You join the crew of people who clean smart.
Wipe each spot clean, then dry it right away so the paint stays smooth and bright.
Dry Cabinets Without Leaving Streaks
Drying painted cabinets the right way matters just as much as washing them, because leftover moisture can leave streaks, dull spots, or even sneak into the finish. You can keep your cabinets looking fresh with air drying, but only after you’ve wiped them dry initially. Use a clean, lint-free cloth and move in gentle lines, not circles, for better streak prevention. Then give each door a quick check under good light.
| Step | What you do |
|---|---|
| 1 | Wipe away water right after cleaning |
| 2 | Pat corners, seams, and handles |
| 3 | Let the surface finish drying on its own |
This simple routine helps you feel confident, and your cabinets stay smooth, bright, and part of a home you’re proud of.
Cleaners to Use and Avoid
Now that your painted cabinets are clean and fully dry, the next big question is what to use the next time they need help and what to skip so you don’t ruin that smooth finish. You’ll fit in with a simple mix of warm water and mild dish soap, plus a soft microfiber cloth. For greasy spots, try diluted white vinegar. Should you want stronger help, choose a gentle cleaner made for painted surfaces, not natural stone cleaners, which can leave the wrong residue.
- You feel safer whenever the finish stays intact.
- You stay proud whenever the color keeps its soft glow.
- You avoid that sinking feeling of peeling paint.
- You protect the calm, clean look your kitchen deserves.
Skip bleach, ammonia, abrasive scrubbers, and harsh aerosol sprayalternatives. They can dull the paint fast, and nobody wants that surprise.
Keep Painted Cabinets Looking Fresh
To keep painted cabinets looking fresh, you’ll want to build a few easy habits into your routine, because small care steps can save you from big touch-up jobs later.
Wipe dust with a soft cloth each week, then clean spills right away so they don’t settle into the paint. Use light pressure and dry the surface after every wipe, since moisture can dull the finish.
Should a spot stays stubborn, test a gentle cleaner first, then clean one section at a time to keep the look even.
For a seasonal refresh, check handles, corners, and faded spots, then do color matching before any touch-up paint. That way, your cabinets stay polished, welcoming, and ready for everyday life, without the drama of a bigger repaint.
Frequently Asked Questions
How Often Should Painted Cabinets Be Deep Cleaned?
Deep clean painted cabinets every few months or once a season, and sooner if grease appears. Checking them regularly helps you remove buildup early, prevent stains, and keep the kitchen looking well cared for.
Can I Use Vinegar on Every Type of Painted Cabinet?
No, vinegar is not safe for every painted cabinet. Start with a small hidden spot to check the finish, and if there is any chance of damage, use a gentler cleaner such as mild dish soap mixed with warm water or diluted Krud Kutter instead.
What Should I Do if Paint Starts Peeling During Cleaning?
If paint begins to peel, stop cleaning right away and cover the area to prevent more damage. For small spots, use a touch up kit. If the peeling spreads, contact a professional refinisher to keep your cabinets in good condition.
How Do I Clean Cabinet Hardware Without Damaging the Finish?
Wipe cabinet pulls and knobs with a damp microfiber cloth and a drop of mild dish soap, then dry each piece right away with a soft towel. For brass hardware, use a nonabrasive brass polish sparingly. If a screw is loose, tighten it with a screwdriver just enough to secure it without scratching the finish.
Should Cabinet Doors Be Removed Before Cleaning?
Yes, remove the cabinet doors if you can. It makes it easier to clean the edges, find hidden grime, and inspect the hinges. Label each door, store the screws safely, and rehanging them will be much simpler.
