
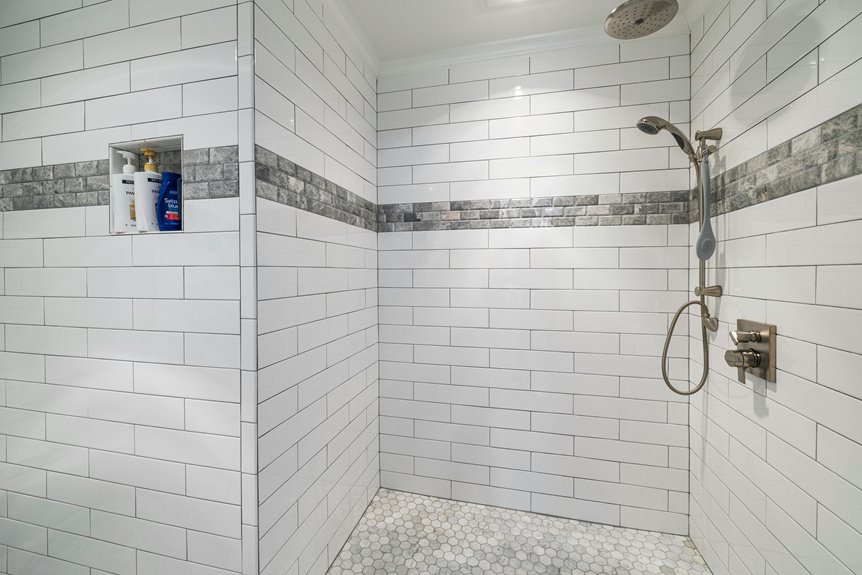
Mold in shower caulk can look stubborn, but you can often beat it with the right mix of care and patience. You’ll want to start air-ing out the bathroom, then choose a cleaner that fits the stain, from a bleach paste to a gentler enzyme spray. After that, a soft scrub and a long soak can make a bigger difference than you’d expect, and the last step is the one that keeps the mold from sneaking back.
Remove Mold From Shower Caulk
Mold on shower caulk can make your whole bathroom feel a little grimy, but you can usually get it under control with a bleach and baking soda paste. Mix it to a thick, pancake batter texture, then spread it generously on the dark spots. A disposable brush helps you coat the caulk without soaking your favorite tools in bleach.
Next, cover the paste with plastic wrap so it stays wet and works longer. Let it sit for several hours, or overnight should the stains look stubborn.
At the moment you peel it off and rinse, the caulk should look brighter and smell fresher, with less mildew odor. In case the mold keeps coming back after a few tries, you might require caulk replacement, but this method often gives you a real win.
Gather the Right Cleaners and Tools
Before you start cleaning, gather a mold cleaner that works on caulk, like bleach, a commercial mold spray, or a strong gel made for shower use. You’ll also want a disposable brush, a small bowl, plastic wrap, and a spray bottle so you can apply the cleaner thickly and keep it wet. Don’t forget gloves and a respirator, because the right gear helps you clean smarter and keeps the fumes from making your day worse.
Effective Mold Cleaners
Get your cleaning setup ready with the right mold fighters and tools, because the job goes a lot smoother once you start with the proper mix.
For shower caulk, bleach works best whenever you need strong mold removal, and baking soda can thicken it into a paste that clings better.
You can also try natural alternatives like vinegar for light spots, or enzymatic cleaners whenever you want a gentler option that breaks down buildup.
Pick a fresh cleaner, because old products lose power fast.
Should the mold stay put, use a gel made for caulk or a spray meant for mildew.
Keep your solution close and let it sit long enough to work, so you don’t end up scrubbing like you’re mad at the shower.
Essential Cleaning Tools
Now that you know which mold cleaners can do the heavy lifting, it’s time to line up the tools that let them work well on shower caulk. You’ll feel more in control whenever you have the right setup nearby. Keep a small bowl, a disposable brush, a spray bottle, plastic wrap, and clean rags close at hand.
| Tool | Use |
|---|---|
| Small bowl | Mix thick cleaner |
| Disposable brush | Spread paste on caulk |
| Spray bottle | Re-wet drying spots |
| Plastic wrap | Hold moisture in place |
| Clean rag | Wipe away residue |
A steady routine also helps your space feel cared for, not chaotic. Add ventilation upgrades provided steam lingers, and check humidity monitors so you know whenever the bathroom stays too damp for mold’s liking. Whenever everything sits ready, you can tackle the job with less stress and more confidence.
Safety Gear Essentials
Handling bleach and mold cleaner safely starts with the right gear, because your hands, lungs, and clothes all deserve backup. Before you mix anything, choose chemical resistant gloves that fit snugly so you can grip your brush without panic or pinched skin.
Next, handle respirator selection with care. Pick one rated for fumes and mold work, then make sure it seals well across your nose and cheeks. Wear old long sleeves, closed shoes, and eye protection too, since splashes love surprise visits.
Keep your cleaner, fresh bleach, a disposable brush, a spray bottle, and plastic wrap nearby so you’re not scrambling mid-job. With your gear set, you can move into cleaning calmly, like someone who’s done this before and knows the shower’s not winning today.
Scrub Mold Off the Caulk Safely
Use a soft brush, an old toothbrush, or a non-scratch scrub pad so you don’t gouge the caulk while you work.
Move in small, gentle circles and let the cleaner do most of the work, since hard scrubbing can spread the mess and wear down the seal.
In case the mold stays put, pause and reapply the cleaner instead of pressing harder, because a light touch usually gets better results.
Safe Scrubbing Tools
A soft touch makes all the difference whenever you scrub mold from shower caulk, because the wrong tool can tear the seal and turn a small cleaning job into a bigger repair.
You want tools that help you fit in with a careful, tidy routine. Choose soft bristles on a small brush so you can reach the edge without scuffing the line. A used toothbrush with a bent neck works well too.
For tight corners, try silicone spatulas to lift grime without slicing the caulk. Keep a sponge nearby for wiping loose residue, and use a microfiber cloth to finish cleanly.
- soft-bristle brush
- old toothbrush
- silicone spatula
- nonabrasive sponge
- microfiber cloth
Gentle Cleaning Motion
Now that you’ve picked a soft brush, the way you move it matters just as much as the tool itself. You want gentle strokes so you don’t nick the caulk or spread the mold around.
Work in small sections, and let the brush glide instead of dig. Use circular motions to lift the grime from the surface, then switch to light back-and-forth passes along the seam.
Keep your wrist loose, because steady pressure does more than force ever will. Should the spot look stubborn, pause and try again rather than scrubbing harder.
That calm rhythm helps you stay in control and keeps the caulk intact. You’re not battling the shower; you’re giving it careful, focused attention, and that makes the job feel a lot more doable.
Remove Deep Mold Stains From Caulk
Deep mold stains in shower caulk can look stubborn, but you’ve got a few solid ways to tackle them before you give up and start ripping everything out. To begin, mix bleach with baking soda into a thick paste, then spread it on with a disposable brush. Cover it with plastic wrap so it stays active longer. Should the stain still linger, re-spray a little bleach solution under the wrap.
For extra help, use enzymatic cleaners on lighter spots, and save professional remediation for damage that keeps coming back.
- Use fresh bleach.
- Let the paste sit longer.
- Check the caulk after an hour.
- Reapply should the stain stay dark.
- Replace the caulk if nothing changes.
That’s how you keep your shower looking cared for, not cursed.
Dry the Area and Kill Leftover Mold
Once the mold stain has loosened, you need to dry the area so the bleach can keep working and any concealed mold doesn’t get a free comeback. Open the shower door or curtain, then aim a fan nearby so air circulation reaches the caulk line. Should you be able to, crack a window too.
Pat the surface with a clean towel, but don’t scrub the softened caulk. You’re trying to remove standing water, not start a wrestling match with it. Let the area stay open until it feels fully dry, and check corners where water likes to hide. Dry caulk helps the bleach finish the job, and it also exposes any stubborn spots you might’ve missed.
Were your shower to have moisture barriers, keep them clear so trapped dampness can’t linger.
Prevent Mold From Coming Back
Mold can come back fast provided your shower stays damp, so your best defense is a dry, well-aired space after every use.
You can keep the peace through opening a window, running the fan, and wiping walls once you finish. That simple routine helps with improved ventilation and gives mold less to grab onto.
- Leave the door open after bathing.
- Squeegee tile and glass.
- Hang wet towels outside the bathroom.
- Check caulk weekly for dark spots.
- Reseal aging joints with an anti microbial sealant.
If you share a bathroom, team up with everyone so the habit sticks. A quick 30-second cleanup feels easier whenever it becomes part of the group rhythm.
With steady care, your shower stays fresher, and mold has a much harder time crashing the party again.
Frequently Asked Questions
Can Bleach Damage Colored Shower Caulk?
Yes, bleach can damage colored shower caulk, causing fading and reducing the strength of the seal. Test a hidden area first, use bleach sparingly, and rinse thoroughly to help protect the shower finish.
How Long Should Bleach Paste Stay on Caulk?
Keep the bleach paste on the caulk for several hours, or leave it on overnight if the mold is stubborn. The paste works best when the caulk stays damp, so check it after about an hour and add more if it starts to dry.
Is Baking Soda Necessary in the Bleach Mixture?
No, baking soda is not needed. It mainly acts as a thickener, helping the bleach stay in place. If you want a baking alternative, try cornstarch, but focus on safe application and test a small area first.
Can I Use a Disposable Brush for Bleach Application?
Yes, you can use a disposable brush for applying bleach. Pick an inexpensive brush with synthetic bristles, since bleach can damage them. This helps keep your hands, surfaces, and cleanup process safer.
When Should Caulk Be Replaced Instead of Cleaned?
Replace caulk when mold comes back after scrubbing, when splits show up, or when it starts lifting from the surface. If the seal fails to grip the material, install new caulk to keep moisture out and maintain a tight barrier.
