

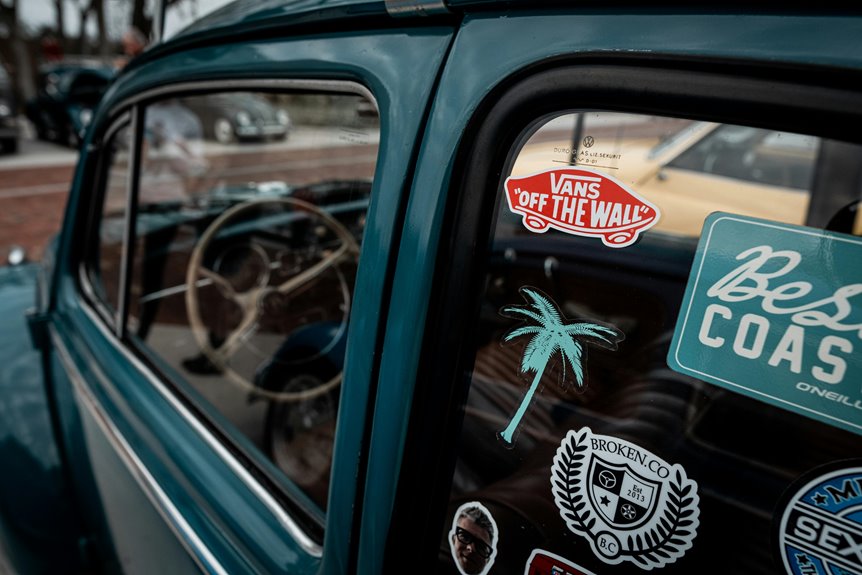

You can remove a sticker from a car window with a few simple tools and a little patience. Start with a plastic scraper, a cloth, and a glass-safe cleaner. Gentle peeling works for fresh stickers, while warm water, vinegar, rubbing alcohol, or heat help loosen stubborn adhesive. The best method depends on how long the sticker has been stuck to the glass.
Gather a Plastic Scraper, Cloth, and Cleaner
Before you start removing the sticker, gather a plastic scraper, a clean cloth, and a glass-safe cleaner so you can work quickly and avoid scratching the window.
You’ll also want to check the sticker types on the glass, because some lift easily while others bond tightly. Different adhesive properties mean you might need a gentler or firmer touch, but these tools give you a safe starting point.
Keep the cloth folded so you can wipe loosened residue without spreading it. Choose a cleaner made for windows, ideally ammonia-free, so you don’t haze the glass.
Once you’re prepared, you’ll work with more confidence, fewer mistakes, and a smoother cleanup. Having the right setup helps you feel in control and part of the process.
Peel Off the Sticker With Your Fingernail
Start with lifting one corner of the sticker using your fingernail, just enough to get a grip.
Then peel it back slowly and steadily, keeping the angle low so it doesn’t tear.
Should you feel resistance, pause and work a little more of the edge free before continuing.
Lift a Corner
Use your fingernail to lift one corner of the sticker, then work slowly to peel it back at a low angle. You’ll get better control whenever you match your grip to the sticker types and their adhesive strength.
Thin vinyl usually releases more easily than thick decals, while older stickers might need a firmer edge to start. Keep your nail under the lifted corner, not against the glass, so you don’t scratch the window.
In case the corner tears, stop and find another edge instead of forcing it. A clean initial lift helps you stay in control and feel confident.
Once a section is raised, you can keep the sticker moving without stressing the glass or your hand.
Slow, Steady Peel
Keep peeling the sticker back slowly with your fingernail, holding it at a low angle so the adhesive releases instead of tearing. You’ll get cleaner results whenever you match the pull to the sticker types and their adhesive properties. Work in short, even lifts, and stop whenever the edge stretches or leaves residue.
| Sticker type | Peel pace | Best signal |
|---|---|---|
| Paper label | Very slow | Edge lifts cleanly |
| Vinyl decal | Steady | Backing stays intact |
| Thin film | Gentle | No cracking |
Should the sticker resist, warm it slightly with your hand, then continue. Keep your free hand near the glass for control, and stay patient. You’re not rushing; you’re protecting the window and joining other drivers who remove stickers cleanly.
Soften Sticker Adhesive With Warm Water
To soften the sticker adhesive, saturate the decal with room temperature or slightly warm soapy water and let it sit for about 10 minutes. You’ll give the glue time to relax, which makes lifting easier and safer for the glass.
Use a plastic scraper or your fingernail at one corner, then keep the surface damp as you work. This method fits sticker preservation techniques whenever you want the decal to stay intact, and it’s one of the simplest adhesive removal alternatives for dried-on stickers.
Should the sticker resist, soak it again instead of forcing it. You’ll avoid unnecessary scraping, reduce residue, and stay in control throughout the job.
For best results, work patiently and wipe away loosened adhesive as you go.
Use Vinegar to Loosen Sticker Adhesive
Vinegar can help loosen stubborn sticker adhesive should warm water alone isn’t enough. You can soak a cloth in white vinegar, press it onto the sticker, and let it sit for several minutes so the acid starts breaking the bond.
This method works well on many adhesive types, especially dried labels on glass. The vinegar benefits include low cost, easy access, and a chemical-free approach that fits your careful routine.
After soaking, lift an edge with a plastic scraper and keep applying vinegar as necessary. Stay patient, because older adhesive might need a second round.
Whenever you remove the sticker cleanly, you’ll protect the window and feel right at home handling the job with confidence and control.
Use Rubbing Alcohol for Stubborn Residue
Pour a small amount of rubbing alcohol onto a clean cloth and press it onto the stubborn residue for a few seconds.
Gently lift the softened adhesive with the cloth or a plastic scraper, working slowly so you don’t scratch the glass.
Then wipe the area clean with a fresh cloth until the window looks clear.
Rubbing Alcohol Prep
Should stubborn residue be left behind after the sticker comes off, you can use rubbing alcohol to loosen the adhesive before you scrape or wipe it away.
You’ll get better results whenever you match your approach to sticker types and adhesive properties, since some labels release quickly while others hold tight.
- Dampen a clean cloth with rubbing alcohol, not enough to drip.
- Press it onto the residue for 30 to 60 seconds so the alcohol can penetrate.
- Reapply as needed until the adhesive softens and turns cloudy.
Work in a small section at a time so you stay controlled and precise.
Keep the glass dry around the spot, and choose a lint-free cloth to avoid extra mess. This prep step helps you feel confident and in control before the final cleanup.
Lift Residue Gently
Once the adhesive has softened, you can lift the residue gently with rubbing alcohol and a clean cloth. Dampen the cloth lightly, press it on the spot, and let the alcohol work on adhesive breakdown for a few seconds.
Then rub in small circles with steady pressure, keeping the motion controlled so you don’t spread the residue. Should the buildup resist, reapply a little more alcohol and repeat the process.
This residue removal method works well on stubborn patches left behind after sticker peeling, and it helps you stay in control without rushing. You’re not alone should the initial pass doesn’t clear everything; persistent residue often needs a second careful pass.
Keep your focus on the glass surface and lift only what’s left.
Wipe Clean Glass
After the sticker residue is gone, wipe the glass with rubbing alcohol to remove the last film and any greasy smudges. Use a microfiber cloth, then turn it to a clean side so you’re not spreading buildup back across the window. This simple step finishes the job and helps your cleaning techniques feel complete.
- Dampen the cloth lightly with rubbing alcohol, not enough to drip.
- Wipe in small circles, then finish with straight strokes for a clear view.
- Should tacky spots remain, repeat with a fresh section of cloth or try mild adhesive solutions like glass cleaner.
You’ll end with smooth, streak-free glass that looks cared for and ready for the road.
Try a Plastic Scraper or Old Card
A plastic scraper or old card can lift a sticker without scratching the glass, especially at the moment you’ve already softened the adhesive with soapy water, window cleaner, or WD-40. Hold the edge low and steady, then nudge under the sticker from a corner. You’ll feel the lift, and that’s normal. Use these plastic scraper benefits: controlled pressure, a flexible edge, and less risk on clean glass. Should you lack a scraper, old card alternatives like a loyalty card or expired ID work well.
| Tool | Use |
|---|---|
| Plastic scraper | Steady lift |
| Old card | Gentle pry |
| Corner edge | Start point |
| Slow passes | Reduce residue |
Work in short strokes, wipe debris away, and stop should the edge dig in.
Heat the Sticker With a Hair Dryer
Warm the sticker with a hair dryer set to low or medium, keeping the nozzle a few inches away and moving it back and forth so the glass heats evenly. This hair dryer technique helps with adhesive softening, so you can lift the sticker with less effort and feel more in control. You’re not forcing it; you’re encouraging it to release.
- Hold the heat on one section for 20 to 30 seconds.
- Test an edge with your plastic scraper or card.
- Reheat stubborn spots instead of pulling hard.
Work patiently, and you’ll protect the window while making removal feel manageable.
In case the sticker cools before it loosens, repeat the process until it peels more easily.
Clean Off Sticker Residue Without Scratching
Once the sticker is off, you’ll often still have a sticky film left behind, and the safest way to remove it’s to work gently with a glass-safe cleaner or adhesive remover.
Spray or apply a small amount, then let it sit briefly so the adhesive properties can loosen without forcing you to scrub. Use a microfiber cloth or a plastic scraper, moving in short strokes and keeping pressure light.
Different sticker types leave different residue, so repeat the process should the film feel thick or tacky.
Should it be necessary, finish with an ammonia-free window cleaner to clear haze and restore shine.
You’re not alone should it take a few passes; careful, patient cleaning protects the glass and helps your window look clean again.
Frequently Asked Questions
Can I Remove a Sticker Without Using Heat?
Yes, you can remove a sticker without heat. Try soaking it with soapy water or holding ice on it, or use an adhesive remover such as Goo Gone or WD 40. Let it sit, then lift it off carefully for a cleaner result.
Will These Methods Damage Tinted Car Windows?
Yes, they can damage tinted windows if you are not careful. Use tint safe care by avoiding razor blades, strong chemicals, and hot water. Check adhesive types first, clean with mild products, and peel tinted film slowly and gently.
How Do I Remove Stickers in Freezing Weather?
Warm the glass indoors first. Cold conditions account for 68% of adhesive failures. For stubborn stickers, chill the sticker briefly with ice, then peel it off slowly. Depending on the sticker, you may also need soapy water or a cleaner.
What Works Best for Old, Hardened Sticker Residue?
Goo Gone works well on old, hardened residue. Soften the adhesive with the solvent, then lift it carefully using a razor held at a shallow angle. Wipe the surface clean, and the glass will look clear again.
Is It Safe to Use a Razor Blade on Glass?
Yes, if you handle it like a surgeon’s scalpel, a razor blade can be safe on glass. To use a razor blade safely, keep the angle shallow, use lubrication, and keep the blade clean to reduce the risk of scratching the glass and to work carefully.
