
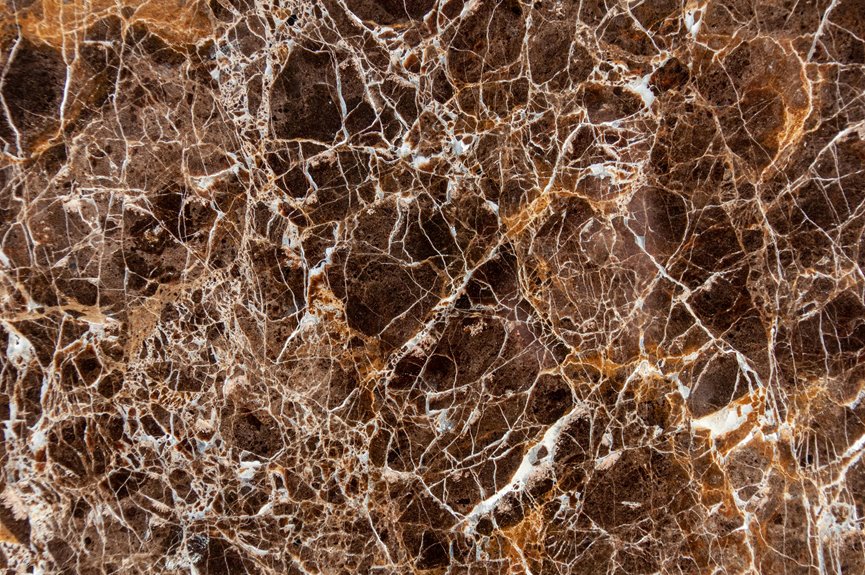
Polishing marble floors starts with a clean surface and the right tools. Use a pH-neutral cleaner to wash away dirt without harming the stone. Light scratches need fine diamond pads before any polish goes on. A steady process can turn a dull floor into a glossy finish.
Prepare Marble Floors Safely
Before you begin polishing, prepare the marble floor safely through clearing the area, dry vacuuming loose debris, and removing dust with a soft mop so abrasive particles don’t scratch the surface.
You’ll protect the stone and support effective marble surface preparation by inspecting for chips, loose grout, and uneven joints prior to setting up equipment.
Wear gloves, eye protection, and non-slip shoes, and keep cords routed away from walk paths. Use safe handling techniques while moving pads, machines, and weights so you don’t drop hardware onto the floor.
In case furniture must stay, shield legs with felt. Mark wet or unstable areas clearly, and work in sections to maintain control.
Careful preparation helps your team achieve a flatter, cleaner substrate and reduces the risk of new damage during the next polishing stage.
Clean Marble Floors With a pH-Neutral Cleaner
You should use a pH-neutral cleaner because it won’t etch marble or strip its finish.
Vacuum or dust mop initially to remove dry grit, then damp mop with the cleaner in controlled passes.
In case you agitate spots, use only a soft, non-abrasive pad and keep the surface from staying wet too long.
pH-Neutral Cleaner Benefits
A pH-neutral cleaner helps preserve marble’s polished surface because it removes soil without etching the stone or dulling its finish. You get pH neutral advantages that protect calcium carbonate, and you still maintain strong cleaning effectiveness for routine care.
It’s the standard choice whenever you want your floor to stay refined and ready for guests.
- Keeps the sheen intact
- Reduces residue buildup
- Supports consistent maintenance
- Helps your space feel well cared for
Use it to clean marble floors with confidence, recognizing you’re working with the stone, not against it.
Whenever you choose a balanced formula, you join a smarter maintenance approach that safeguards appearance and extends the life of your polished marble.
Safe Marble Cleaning Steps
Start with a dry vacuum or dust mop to remove grit. Then wash the marble using a pH-neutral cleaner diluted per the label so loose soil comes off without etching the stone.
You’ll protect the finish by working in small sections and using a clean microfiber mop, not a soaked one. Rinse with fresh water should the product require it, then dry the surface immediately with a soft towel to prevent streaks and moisture marks.
For marble maintenance tips, keep the cleaner contact time short and address spills at once. Choose eco-friendly cleaners that list neutral pH and no acids or abrasives.
This approach helps your floor stay uniform, polished, and safe for everyone in your home.
Remove Light Scratches and Dull Spots
For light scratches and dull spots, use honing to remove the visible damage and restore smoothness prior to moving to full polishing. You’ll belong to the group of owners who correct marble the right way through using proven scratch removal techniques and targeted dull spot remedies.
- Inspect the floor under raking light.
- Mark scratches, etches, and cloudy patches.
- Run 100-grit diamond pads with steady pressure.
- Repeat with 200-grit pads until the surface looks uniform.
Keep the machine moving to avoid creating new marks, and overlap each pass for even refinement. Wipe away slurry often so you can read the stone clearly.
As the dull areas blend with the surrounding marble, you’ve prepared a consistent base for polishing without overworking the finish.
Use Baking Soda for Gentle Shine
Mix a baking soda paste to give polished marble a gentle, refreshed sheen without harsh abrasion. You can trust this method whenever you want controlled cleaning that fits your space and protects your finish. Baking soda benefits include mild alkalinity and fine particle action; baking soda applications work best on light haze, residue, and minor dulling.
| Mix | Ratio | Use |
|---|---|---|
| Baking soda | 2 tbsp | Paste base |
| Water | 2 tbsp | Bind powder |
| Cloth | Damp microfiber | Apply evenly |
| Time | 3-5 min | Short dwell |
| Finish | Rinse dry | Remove residue |
Apply the paste with a soft cloth, work in small circles, then wipe clean with fresh water. Dry the marble completely so you keep the surface uniform and your floor stays welcoming and refined.
Apply Marble Polish for More Gloss
Once the marble is clean and dry, you can apply a marble polish to deepen the gloss and refine the surface finish. Choose a formula made for marble, then work in small sections so you maintain control and even coverage. Your polish techniques should support gloss improvement without leaving residue.
- Shake or stir the polish thoroughly.
- Dispense a thin, uniform layer.
- Let it haze per the label.
- Wipe away excess with a dry microfiber cloth.
You’ll see the surface take on a clearer, brighter reflection as you keep pressure light and movement consistent.
Avoid overapplying, because buildup dulls the stone and invites streaks. As you follow the manufacturer’s dwell time, you protect the finish and preserve the polished look your marble deserves.
Polish Marble Floors by Hand or Machine
Should you want to polish marble floors with hand or machine, begin with matching the method to the floor’s condition: hand polishing works best for small areas and light dullness, while a variable-speed machine with diamond abrasives is the better choice for larger surfaces or deeper wear.
You’ll get the most control with hand polishing on corners, thresholds, and localized marks, where measured pressure lets you refine the stone without overworking it.
For broad rooms, machine polishing delivers uniform results faster, and you should move through the grit sequence methodically to restore clarity.
Keep the pad flat, overlap passes, and maintain steady speed. That disciplined approach helps you and your team achieve a consistent finish that looks intentional, professional, and fully integrated across the floor.
Seal Marble Floors to Protect the Finish
Choose a penetrating sealer formulated for marble so it can reduce stain absorption without leaving a visible film.
Apply it only to a clean, fully cured surface, and follow the manufacturer’s coverage and dwell-time requirements.
Reapply the sealer at regular intervals, typically every 12 to 18 months, to maintain protection and preserve the polished finish.
Choosing The Right Sealer
To protect a polished marble floor, you need a sealer that creates a durable barrier without dulling the finish or changing the stone’s appearance.
Choose from sealer types that suit your marble and traffic level:
- Penetrating sealers for stain resistance.
- Impregnating sealers for deeper protection.
- Topical sealers only once approved for marble.
- pH-stable formulas that preserve gloss.
Check the label for acid sensitivity, coverage rate, and compatibility with polished stone.
Evaluate application techniques carefully: apply thin, even coats with a microfiber applicator, then wipe excess before it sets.
Test initially in a concealed area to confirm clarity and sheen.
Once you select the right product, you protect your floor while keeping it in the polished finish community homeowners trust.
Reapplying Sealer Regularly
Reapply sealer on a regular schedule so your marble keeps its stain resistance and polished appearance, especially in kitchens, entries, and other high-traffic areas.
You should inspect absorption every 12 to 18 months, then confirm which sealer types match your stone’s porosity and finish. Penetrating sealers protect below the surface, while impregnating formulas offer longer service life.
Before you coat, clean, dry, and test a small area. Use controlled application techniques: spread an even film, allow proper dwell time, then wipe excess before it dries. Avoid pooling, streaking, and skipped sections.
After curing, evaluate water beading and reapply should the stone drinks moisture quickly. This maintenance step helps your floor stay protected, uniform, and ready to belong in a well-kept home.
Keep Marble Floors Shiny With Simple Care
Keeping marble floors shiny starts with consistent care: dust mop daily, vacuum dry debris before damp mopping, and use a neutral pH cleaner so you don’t etch the stone.
Your marble floor maintenance routine should also protect the finish between professional treatments. Follow these shine improvement techniques:
- Wipe spills immediately to prevent acid damage.
- Use a damp microfiber mop, not excess water.
- Place mats at entries to trap grit.
- Buff lightly with a dry microfiber cloth after cleaning.
These steps preserve gloss, reduce microabrasion, and support the polished surface you want in your space.
As you stay disciplined, you keep your floor looking refined, durable, and part of a home that values clean, shared standards.
Frequently Asked Questions
How Do I Fix Lippage on Uneven Marble Flooring?
Fix lippage by grinding the high spots with 30 to 50 grit diamond pads, then hone the surface until it is flat. This sharp edge often comes from uneven installation or settling. Use leveling methods and check the floor again with a straightedge.
When Should Marble Floors Be Ground Instead of Honed?
You should grind marble floors when lippage, deep scratches, stains, or subfloor settling are present; marble floor maintenance then begins with 30 to 50 grit diamond grinding before honing to achieve flatness and a refined finish.
What Grit Progression Is Needed for Professional Marble Polishing?
You’ll need 50 or 100 grit, then move through 400, 800, 1500, and 3000 in sequence; that grit progression supports professional marble polishing and produces a flat, luminous finish.
How Often Should Marble Floors Be Resealed?
Reseal marble floors every 12 to 18 months, based on foot traffic and wear. Regular sealing helps prevent stains and keeps the surface protected, polished, and usable.
What Chemical Treatment Creates a Mirror-Like Marble Shine?
Crystallization produces the mirror like marble shine. Apply the chemical solution and polishing compound, then buff with a hogs hair pad. This treatment hardens the surface, boosts gloss, and leaves a polished, inviting finish.
